This tip goes out to the Coordinators, Administrators, and Managers of the non-design variety. So you’re not a designer, (I’m right there with you!) but you’ve been tasked with creating and printing your company’s brochure or newsletter. You have no experience in InDesign, Illustrator, or other design software, so you rely on the products that you know and are familiar with, which tends to be Microsoft Office. The design you created is great—you have sharp digital photography, excellent copy, and an aesthetically pleasing layout. Now this question remains: how do you send your file to a commercial printer?
 To help you understand a bit more about the differences between the heavy-duty design functions of products like Adobe Creative Suite and the easy-to-use programs in Microsoft Office, let’s take a look at what is involved:
Our premedia department supports many software programs in their native file format, including InDesign, Illustrator, PhotoShop and Quark. These programs are sophisticated graphics programs that have technologies that support four color process, spot colors, high resolution graphics and screens that are required for high quality commercial printing.
 They also have color controls necessary to assure consistent quality in a printing environment. Finally, these programs are PostScript based. PostScript is a technology developed by Adobe and is used in the Graphic Arts industry. Programs such as MS Word are intended for an office environment (lower quality, less sophisticated documents) and do not contain many of these technologies.
But all is not lost for the non-designers: B&B does support PDF (Portable Document Format) files. You can create a PDF of many file types, including MS Publisher files, using Adobe Acrobat. By creating a PDF, we can generally take your file and image and print it.
It is important to know that all PDFs are not created equal. You must have the appropriate settings for PDF files to create a print optimized PDF. Below are the steps to take to save a PDF for commercial printing.
For Microsoft Publisher
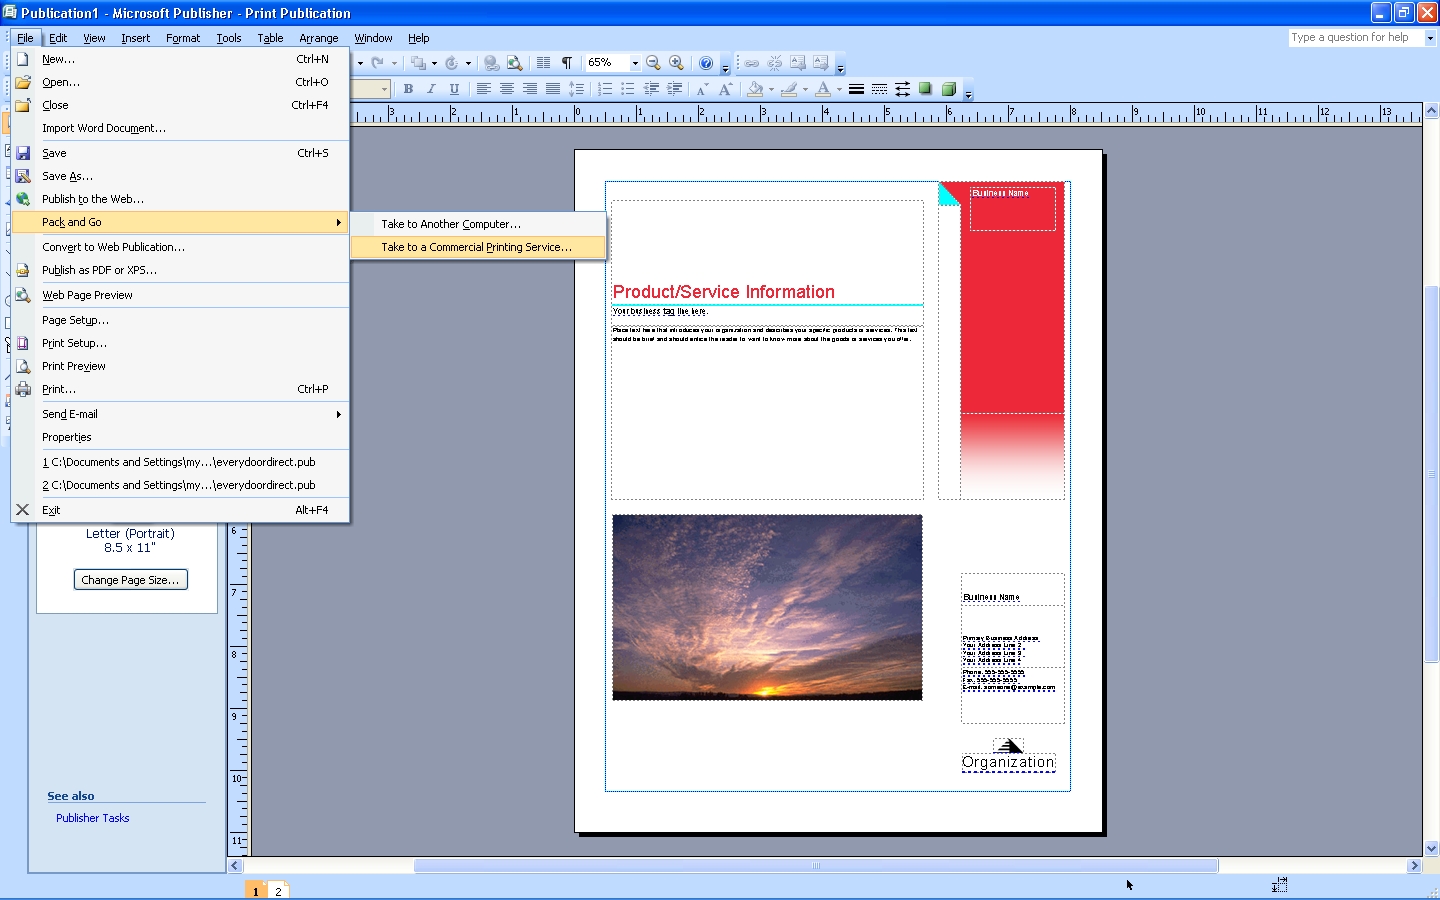
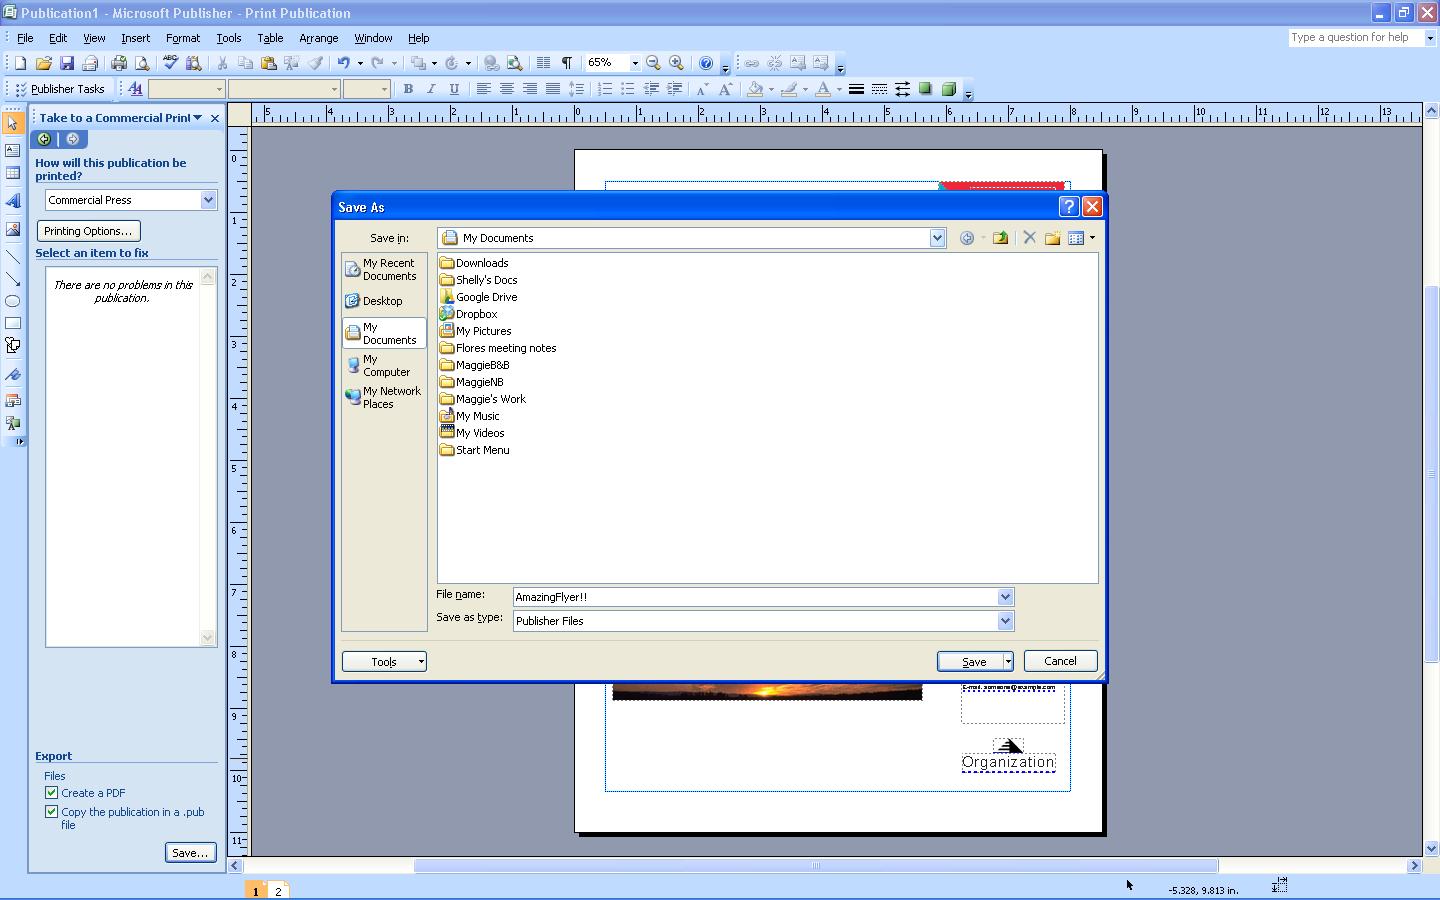
On the File menu, point to Pack and Go, and then click Take to a Commercial Printing service.
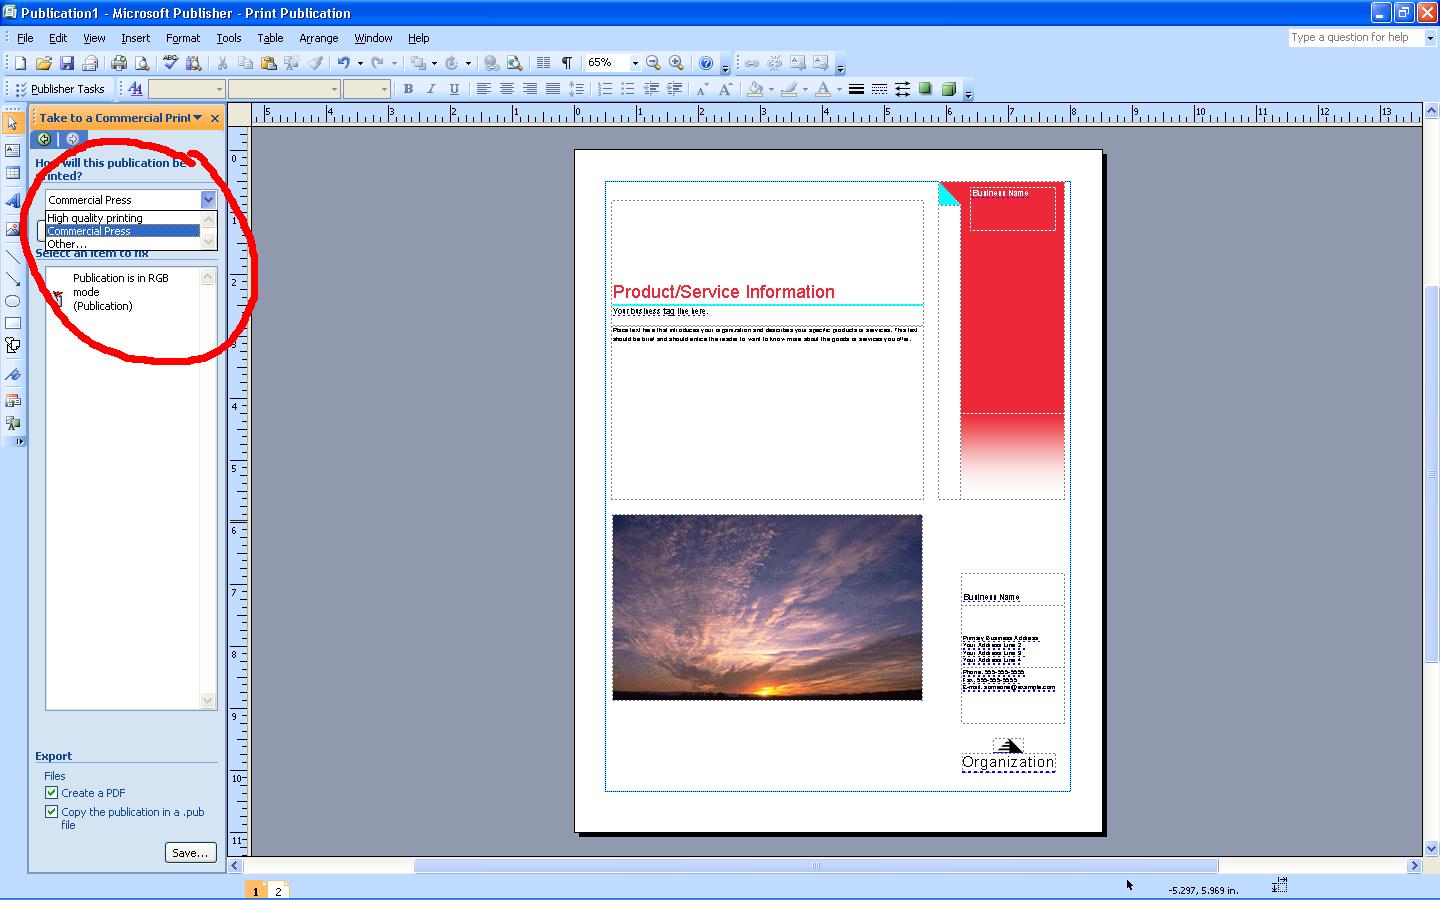
In the pane at left, in the How will this publication be printed? list, click the option that you want. Since you will be using an offset printing service, click Commercial Press.
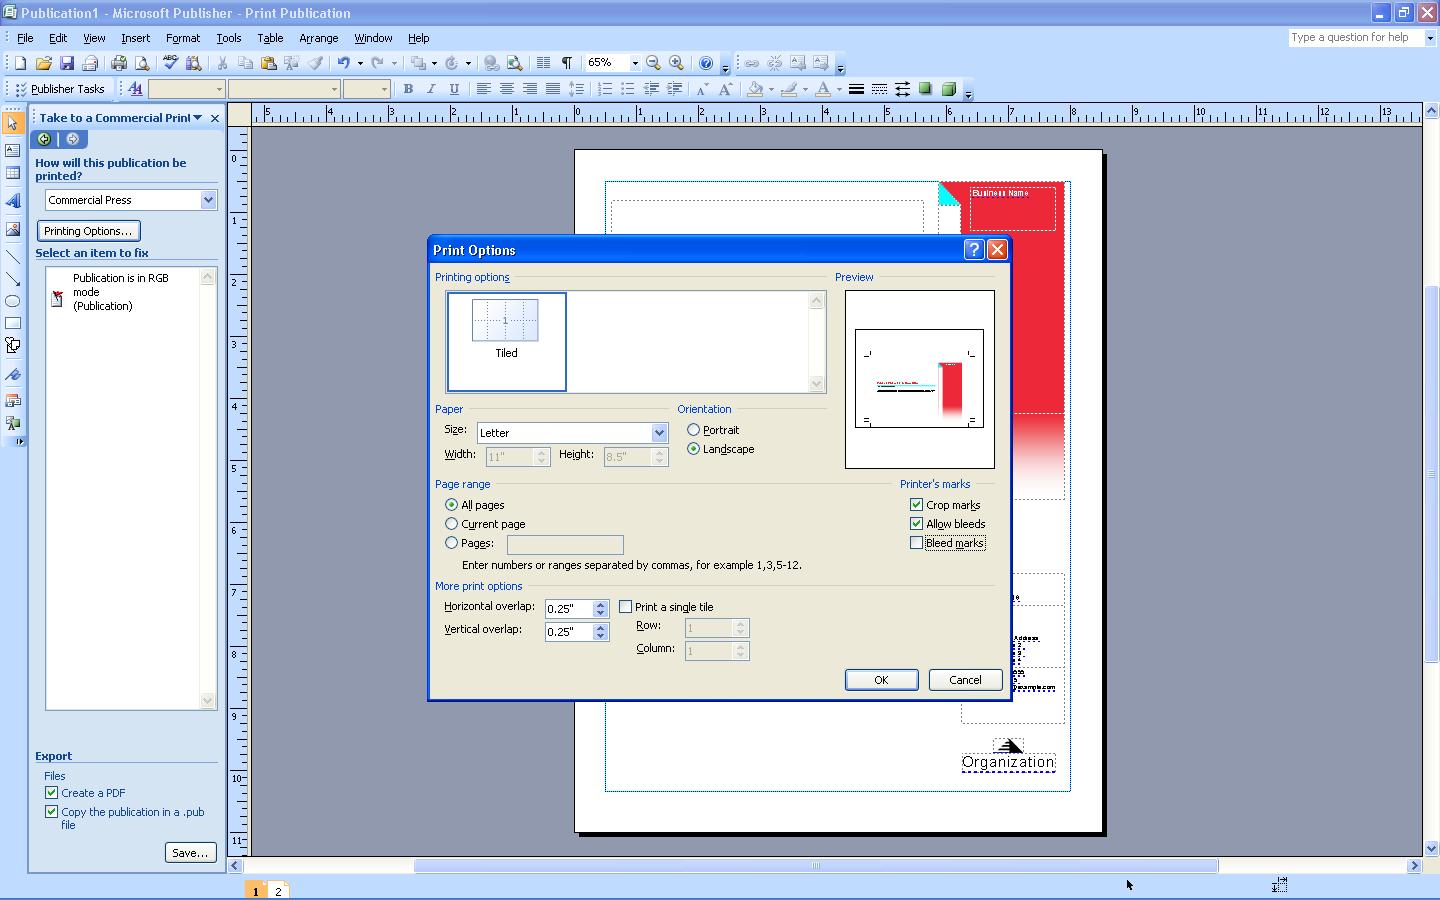
Click Printing Options. In the Print Options dialog box, select the options that you need. Make sure you check the “crop marks” and “allow bleeds” check-boxes.
Under Select an item to fix, repair any problems that Publisher has identified. This includes converting the color from RGB. A general rule of thumb is to choose the process plus spot option if you are unsure of what choice to make. Under Export, select the Create a PDF check box and click save!
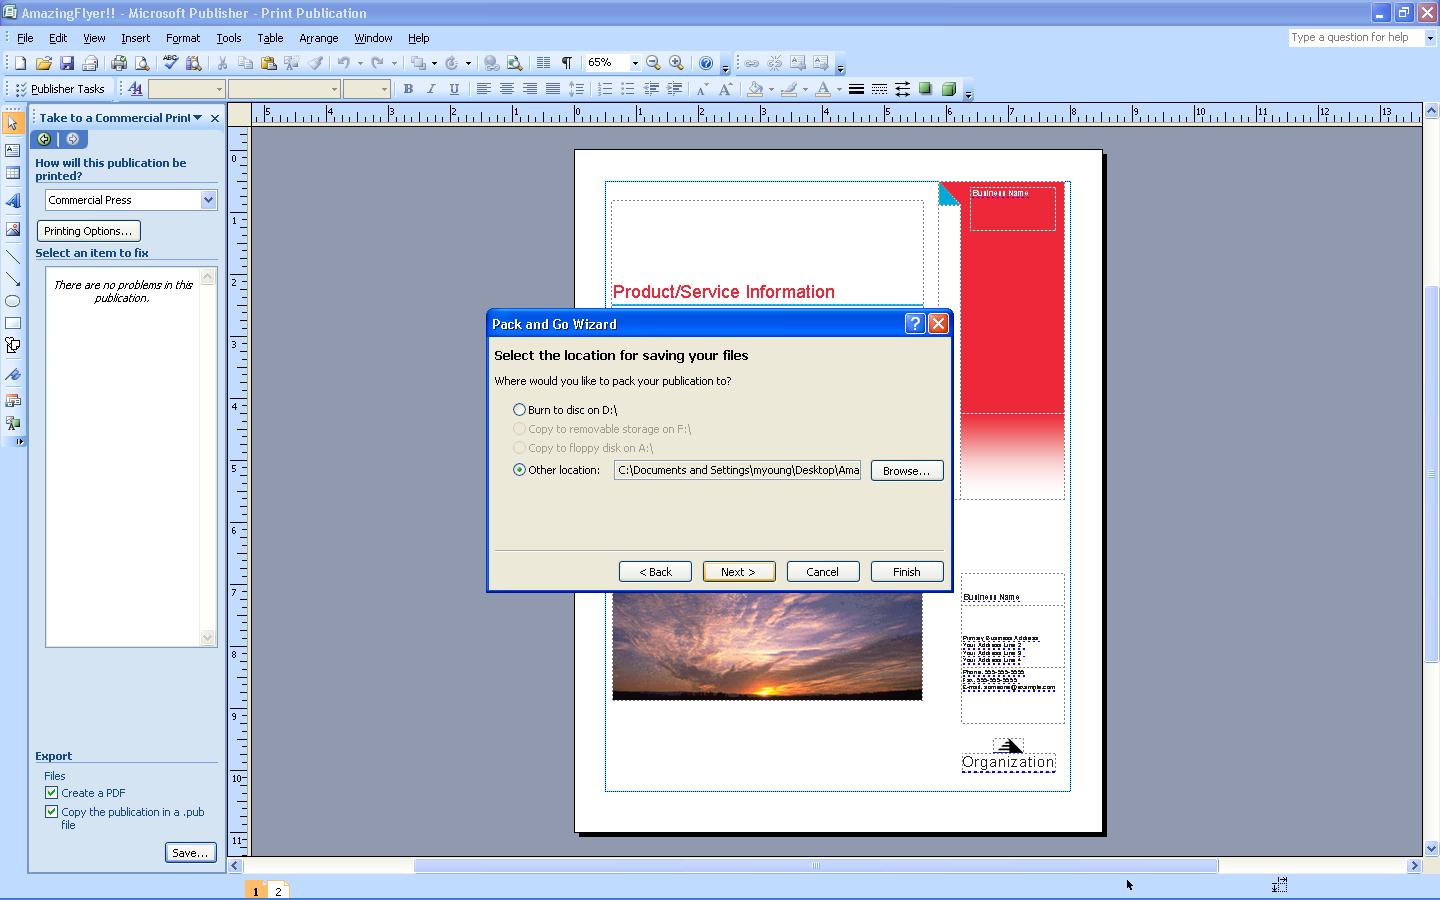
In the Pack and Go Wizard, select the location to which you want to export the file, and click Next.
If you want to make changes to the PDF after saving it, return to your original 2007 Microsoft Office system file in which you created it and save the file as PDF again
For Microsoft Word:
- Click the Microsoft Office Button, point to the arrow next to Save As, and then click PDF or XPS.
- In the File Name list, type or select a name for the document.
- In the Save as type list, click PDF.
- If you want to open the file immediately after saving it, select the Open file after publishing check box. This check box is available only if you have a PDF reader installed on your computer.
- Next to Optimize for, do one of the following, depending on whether file size or print quality is more important to you:
- If the document requires high print quality, click Standard (publishing online and printing).
- If the print quality is less important than file size, click Minimum size (publishing online).
Click Options to set the page range to be printed, to choose whether markup should be printed, and to select the output options. (Find links to more information on these options in the See Also section.) Click OK, then click Publish.
Luckily, Microsoft and Adobe work together seamlessly to create a package that works perfectly for those of us who may not have the resources or talents to use complex design software. Happy printing everyone!
By +Maggie Young
kingfisherpress
Reblogged this on kingfisherpress and commented:
Handy tips on preparing files from MS Office